You can always just dial in to use your conference line 24 hours a day. However, scheduling an event takes no more than 10 seconds and enables additional features like broadcasting on the web and slides. Scheduled events also automatically include a backup recording. You can even do it at the last minute, e.g., an event that you set up at 12:01 or 12:05 for a 12:00 "start time" will still work.
How to Create Live Events
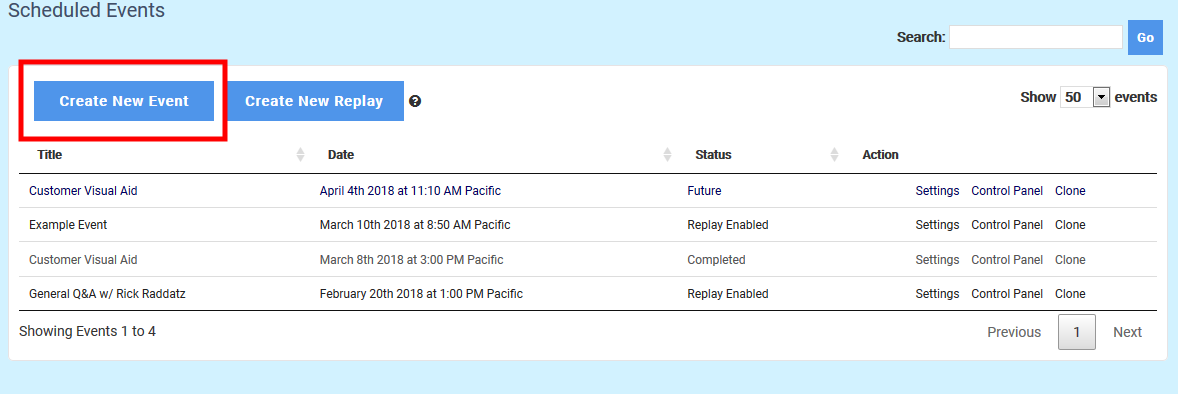
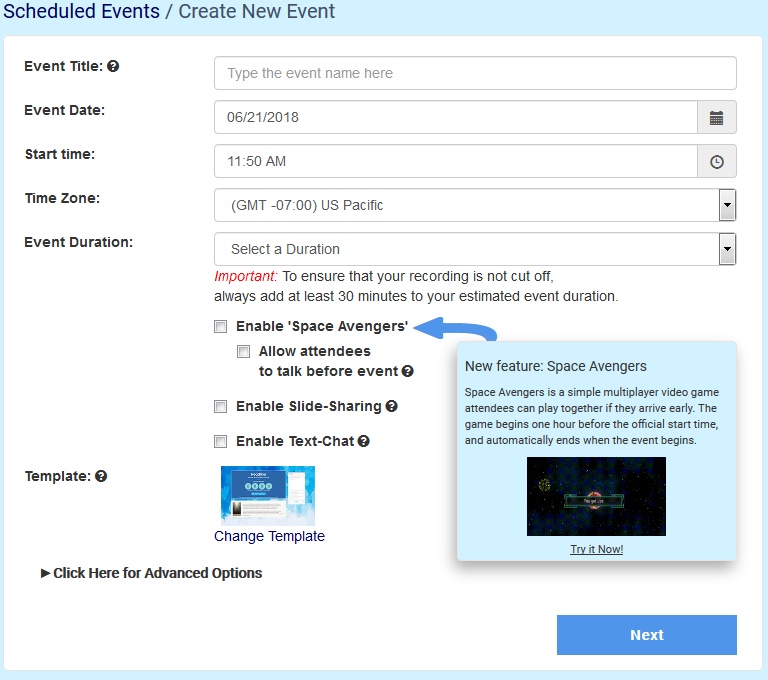
To create a live event, click 'Scheduled Events' on the left side of your account, then click the 'Create New Event' button. When you click the 'Create New Event' button, you'll see the event basic settings at the top, with the Advanced Options hidden at the bottom.
Basic Options
After you have filled in the fields and chosen any non-default settings for your event, click the Next button to create the event.
Event Title: The event title appears only to you in the members area, guests will not see it.
Event Date: Set to any day up to 6 months in advance. Our system will default to 1 hour in advance when the page loads. Note: Cloned events will have a default of 1 week in advance not 1 hour.
Start Time: Our system uses a 12 hour clock in the event creation so be sure the AM/PM setting is correct.
Time Zone: The default will be in your computer's local time zone but you can change that if you would like. Note: The event page will show the local computer time of whoever is viewing so guests will see their local time displayed just like the host will see their local time.
Event Duration: Caution! Be sure to schedule your events for longer than you think they will last, since events will end automatically at the scheduled end time. You can add time on the Control Panel > Webcast tab, but you must do it before the timer reaches zero.
Enable 'Space Avengers': Space Avengers is a simple multiplayer video game attendees can play together if they arrive early. The game begins one hour before the official start time, and automatically ends when the event begins.
Allow attendees to talk before event: This feature switches the conference line to 'Party Mode' for the 1 hour pre-event period, which lets your listeners speak without having a host connected.
Enable Slide-Sharing: This option is required to display slides and/or pre-recorded youtube videos during an event. You can see more details about slides presentations here: Displaying Slides and Pre-Recorded Video
Enable Text-Chat: This option enables our live chat on the event page. Live chat will be available 15 minutes before the event start time. Note: If you access your event more than 15 minutes before the event start time you may need to refresh the browser before the chat will become available.
Template: You can choose from different template backgrounds by clicking the link 'Change Template', and then clicking on the new template image in the pop-up to select it.
Advanced Options
When you click the text 'Click Here for Advanced Options' on the live event creation page a drop down will show additional options for your event.
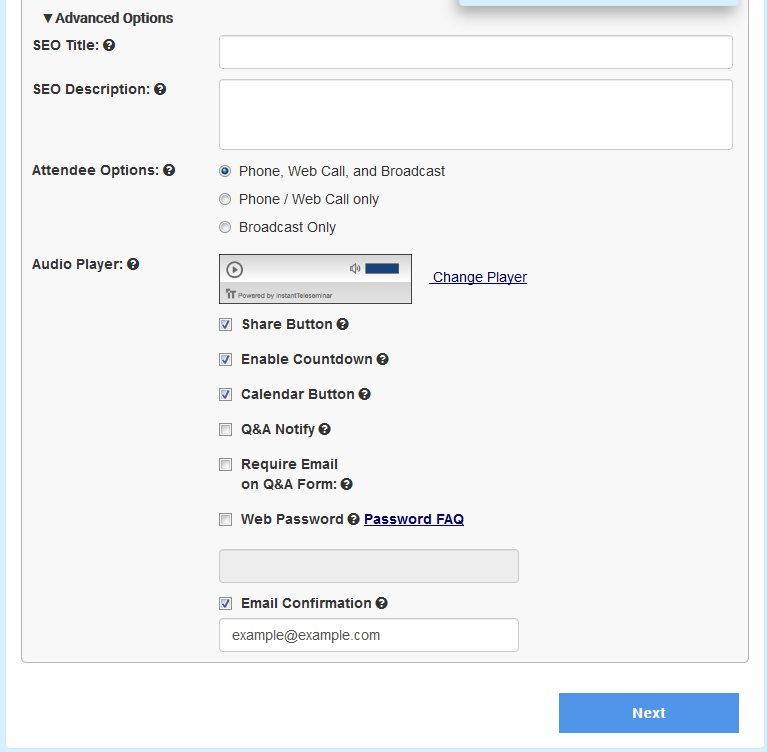
SEO Title: The SEO title is used for search engine optimization and can be up to 70 characters.
SEO Description: The SEO description is used for search engine optimization and can be up to 200 characters.
Attendee Options: These are the options that will appear to participants on your event page. Note that as a host, you must connect by Phone or Web Call, since Broadcast is listen-only.
Audio Player: Choose the look for the audio player during an audio only event. (There will be a preview that shows to the right side of each option)
Share Button: Lets participants share the event page on social networking sites like facebook or twitter. You can see more information about the Share This system on their site. Share This Website
Enable Countdown: This setting will turn off the Countdown timer that shows on the Event Page as well as any countdown iframes.
Calendar Button: This setting will turn off the 'Add to Calendar' button that appears on the event page before the official start time. This is helpful if you have a different registration process that already uses an Add to Calendar feature.
Q&A Notify: If enabled, our system will send an email to the address currently on file for your account whenever a listener submits a question on the event page. This is useful to enable on the replay page, so that you'll receive questions submitted after the event ends.
Require Email on Q&A Form: This requires that listeners who are submitting a question from the Q&A form on the event page leave an email address. This can be useful if you are wanting to determine who listened to your event over the web.
Web Password: When enabled, listeners will be required to enter a password before accessing your online event page. This password does not affect phone participants--there is a separate password that can be enabled for the conference line from the (Conference Line > Call Settings) page. Also see this article on passwords.
Email Confirmation: Sends a message to the email entered in the field provided that has the event details and connection information.
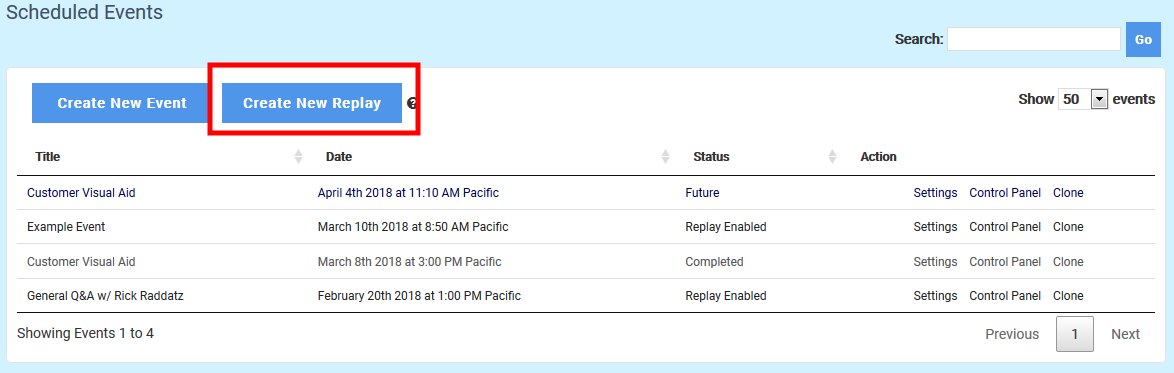
How to Create Replay Events
To create a replay event using a previously recorded audio file without having a live call, click 'Scheduled Events' on the left side of your account, then click the 'Create New Replay' button.
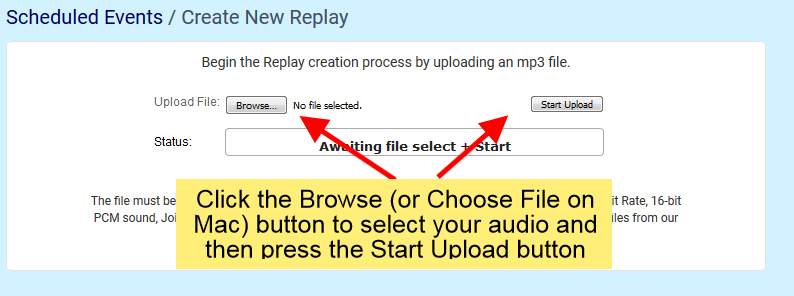
Next, choose a previously recorded audio file from your computer to upload as the replay.
After you have uploaded the audio you are then able to adjust the replay settings for the call as shown here.
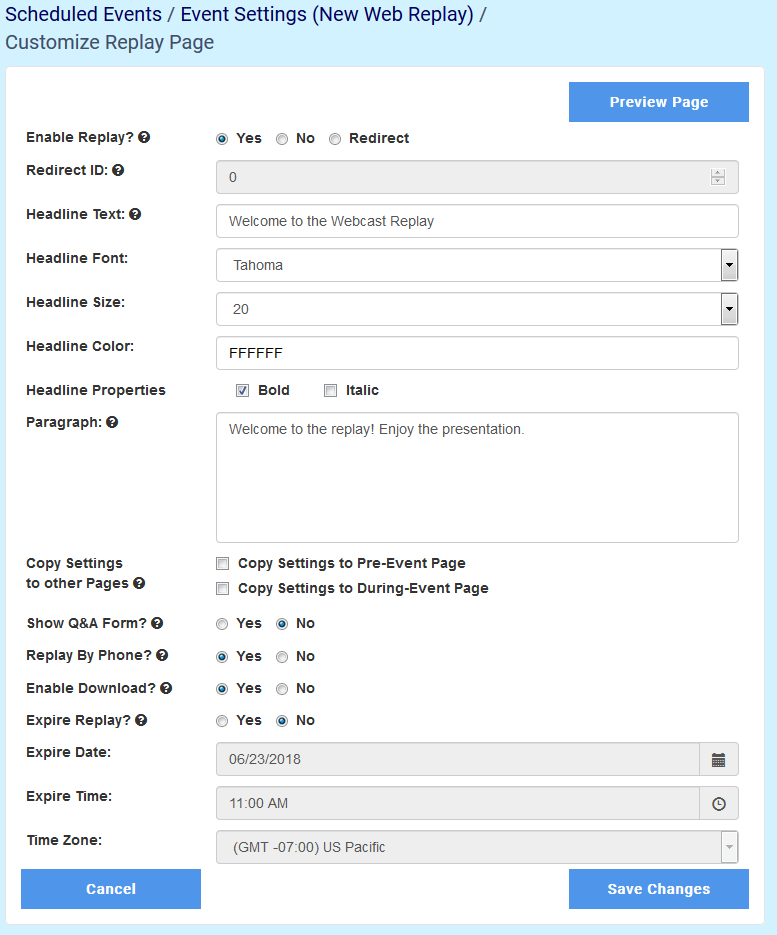
When you click the Save Changes button at the bottom, the replay will be available and you can give access to participants with the replay link provided.
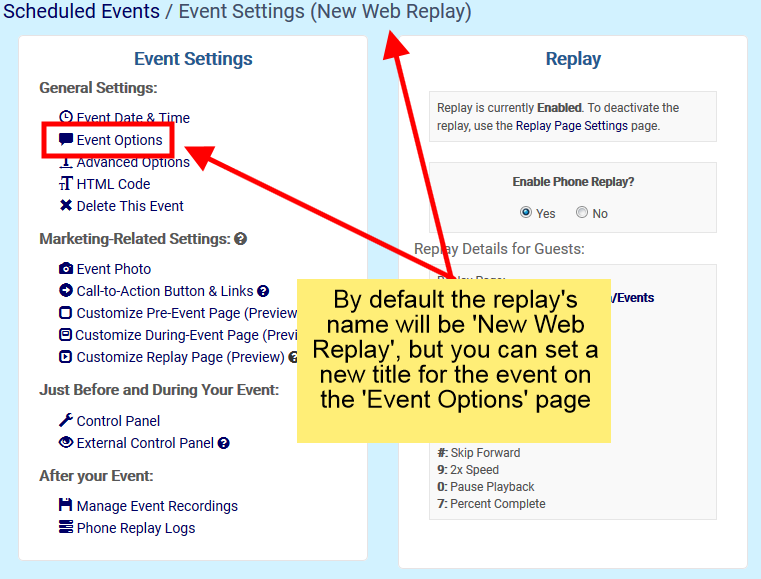
Note: The default name for a new replay is simply 'New Web Replay' but you can change that in the Event Options area.